|
Engine overhaul and the front crank pulley nut!
|
|
The best way to take the crank
front pulley nut off:
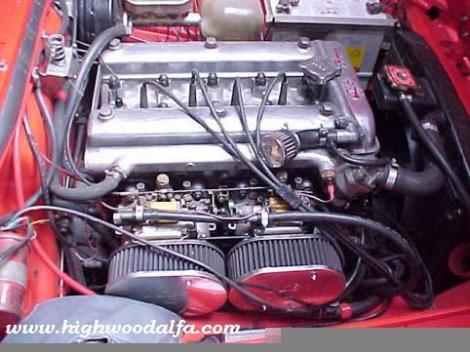
Engine overhaul
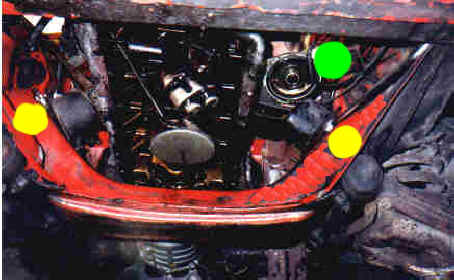
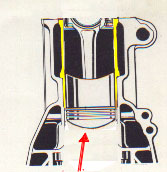
Since my Spider is a 1967 with floor-mounted pedals, the servo booster is what you see far right, green dot. You may also notice, that the liners have been removed, dots and so has the battery, blue dot. The red dot is the oil filter support. No spin-on filters 1967.
Cylinder Head
Camshafts
There was this little leak in the exhaust hole on cylinder #3. The hole expanded when hot and the oil was disappearing and my money too. A new head solved that problem.
Pistons and rings and liners!
No need to remove the engine for this
kind of operation. Place a hydraulic jack and use a piece of
wood under the oil sump so you do not damage the alloy fins.
Loosen the engine supports. Raise the entire engine as much as
possible. Normally it's enough when the gearbox hits the body,
so you may place something between the engine supports and the
engine bay. The dots on the photo show how I do it. The green
dot shows the oil filter support.
Then raise the entire car and use supporting jacks for safety. Never ever work under the car if it's not secured by jacks. If you haven't already drained the engine oil, this is the time to do so. Otherwise you will need to wash your hair in kerosene. Undo the bolts and nuts securing the sump to the engine block. The image shows the wooden distances to raise and support the engine.
Gently draw the sump forward to get
access to the crankshaft. From underneath the engine, remove
the bearing caps and mark them. They are already stamped with
the number of the cylinder, but just to be sure ... Start with
the bearing caps on the second and third cylinders. They are
at their bottom dead point if you have done the right thing.
Slowly turn the crankshaft 180 degrees until the first and
fourth bearing cap is at their bottom dead point and remove
these too. On the Alfetta and 75/Milano overhauling is even
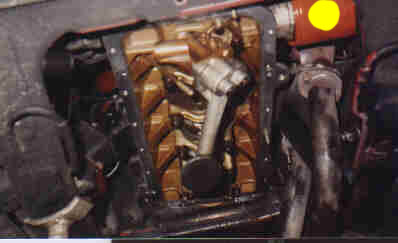
more easy. Just raise the car and remove the sump. Note the
spin-on filter, yellow dot.
Be careful so you do not damage the bearing surfaces of the crank-shaft and gently press the pistons upwards. Cover the crank-shaft bearings one by one while working. Mark the pistons so you know which is # one etc. Check if the pistons are of the offset kind. If so, there is an arrow on top of the piston. The arrow shows the direction from intake to exhaust, so be careful not to turn it the opposite way. If your engine is so old that it has the non offset pistons, I would replace them with newer ones. The Alfetta 1,8 pistons are excellent and easy to find. Both liners and pistons will fit your engine like new. The next photo shows the Milano engine with the liners removed, dots. As usual, the engine is still in the bay.
Be careful not to damage the surface
when you remove and change the rings. There are several tools
for this purpose, but you own hands might be OK too. The rings
are marked "TOP" etc. Have a look in a workshop
manual if in doubt. Remember to keep the openings of the rings
away from each other, i.e. 120 degrees. To remove the liners
you may try just to press and draw them upwards. There are
special tools for this purpose, however some are expensive. I
use an old piston with the top ring on. Put it up side down in
the liner until the top ring is expanding and then use a soft
hammer and a piece of wood to remove them both. Remember to
use an old piston, not the new one. The next photo might give
you the idea.
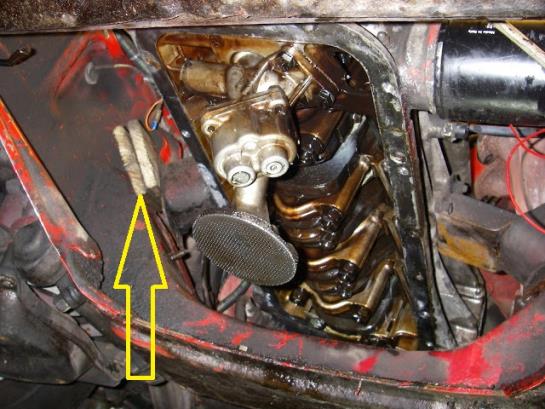
Liner in block
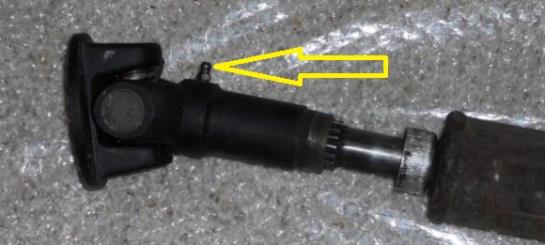
While you're at it, remember to grease the prop shaft at least once a year. Use the proper grease for the prop shaft splines. The nipple is at the yellow arrow. This will make your Alfa Romeo very, very happy for many years.
|